Friday, 17 June 2011

Some Bed Curtains - Five Years in the Making

In 2006 my husband went on a shopping centre tour of the United States (dream job huh?).  The one thing I asked for was the latest Pottery Barn catalogues (and some duty-free perfume).  On page 100 of the Pottery Barn Kids catalogue I saw this....

Pottery Barn Fall 2006 Catalogue

Oh how my daughter would love those curtains.  Back then Pottery Barn didn't ship to Australia, and there was nothing this pretty in the shops here.  I thought one day I'll make them.

Months (or more) rolled by but eventually I got motivated and found some plain white sheer curtains from IKEA, some good quality felt in blue, yellow, light pink and dark pink, and some bright DMC embroidery thread in co-ordinating colours.  I made templates for a flower, bird and butterfly and carefully cut out the felt.  Having never really done any applique/embroidery before I wasn't sure what to do next, so I packed it all away in a bag and conveniently forgot about it.


Then we were transferred to the UK for 2 years and everything went into storage.  I forgot all about these little felt shapes until I pulled out my sewing gear a few weeks ago.  Oh dear.  My little 5 year old girl is now 9.  My window of opportunity was closing.  Make these cute curtains now so she can enjoy them before we enter the pre-teen world of Justin Bieber.


So I grabbed my needle and DMC thread and started stitching.  I used a simple running stitch and some french knots (which I had to watch a You Tube video to work out how to do - Martha's pictures were confusing).


Once all the felt shapes were made, I played around with the placement.  I also cut small lengths of pink & white polka dot ribbon to tie the curtain to the curtain rail of the bed crown.  Then I glued the felt shapes to the curtain using clear drying washable fabric glue and finished the rest of the hand embroidery.


I had some pretty grosgrain ribbon which I sewed down the inside edge of each curtain.  Then I simply hemmed and pressed the curtains ready to hang.


We centred the bed crown above my daughter's bed and attached it to the wall.  Not a wall stud in sight of course, so we used many wall anchors to ensure it would not fall down.  Then with much anticipation we hung the curtains.


The bed crown was part of the Brittany collection at Recollections/Early Settler


Lastly I made this pillow.  It's white cotton on the front, hot pink on the back with green ric rac sewn into the seams and an iron-on applique that I like to call Shopping Girl.  So she has something cute and something a bit more grown up.

I can tell you that making these bed curtains was a labour of love and a long time in the making, but I am thrilled with them and so is my daughter.  When she does grow too old for them I am going to store them away and hopefully one day she might hang them above the cot (crib) of her daughter.  Made with Love.


Sharing all my hard work with these beautiful ladies:

French Country Cottage - Feathered Nest Friday
My Romantic Home - Show & Tell Friday

and

The Shabby Nest - Frugal Friday
Freckled Laundry - Air Your Laundry
Tattertots & Jello - Weekend Wrap Up Party

Wednesday, 15 June 2011

Serving Up Chalkboard

I own a book called Table Inspirations by Emily Chalmers (Available from Amazon here).  It is filled with lots of ideas for decorating your dining table and absolutely beautiful photography.  In the photo below a piece of slate with chalk writing is used as a place mat.


Source Table Inspirations by Emily Chalmers
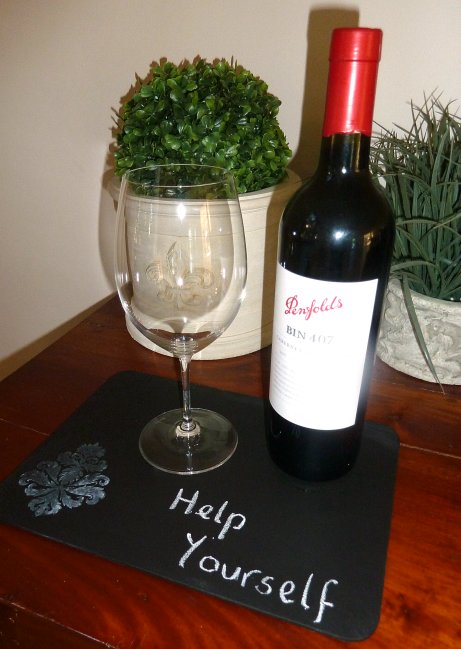
 Slate is a little hard to come by in Brisbane but I thought I could probably achieve something similar with an MDF place mat and some chalkboard paint.


Firstly I had to seal the fibreboard (birch) with a sealer/undercoat.  I use Taubmans 3 in 1. Then I gave the place mats 2-3 coats of chalkboard paint. 

When they were dry I seasoned the chalkboard by rubbing it all over with the side of a piece of chalk, and then wiping it clean.  I added some felt (or you could use cork) feet to the bottom of the place mat to protect the surface of the table.  This is the end result.....


Hmmmm.... A little boring I think.  So I grabbed a rubber stamp and some Stayzon Opaque white ink and added this.


A damask stamp to the bottom corner.


A scroll corner stamp.

I found the mini easel in the discount store.  It was a bright gold colour, so it got a coat of white paint.


I can imagine painting a long strip of wood to use as a table runner down the centre of a table, or large square place mats.  You could place a small mason jar of chalk on the table so your guests could play naughts and crosses (tic, tac, toe) or write messages.  You could stamp any design onto the chalkboard - hydrangea, bird, chandelier ....  Oh the possibilities.

P.S  The little chalkboard labels on twine were from Somerfield - a funny little supermarket in London.

Showing my crafty side here:


Tuesday, 14 June 2011

And It Was Half Price

On Friday I was visiting a friend in the bayside suburb of Wynnum, so I decided to have a quick look through all the op shops (charity shops) while I was there.  Wynnum has the highest concentration of thrift shops in the whole of Brisbane.  I don't know why?  In the end I made two purchases.


The tray is a reproduction but it is A1 silver plate and nice and heavy.  I liked the leaf scroll pattern around the edges and figured if I wasn't able to remove the tarnish I could always paint it.  It was $10 but when I went to the counter the lady said "It's 50% off bric-a-brac so that will be $5".  Bargain!

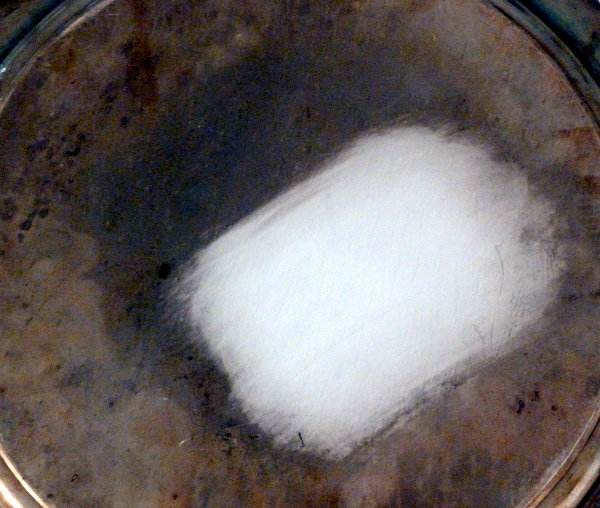
Armed with my trusty Autosol car polish, I did a test patch on the back to see how it would turn out.  This car polish is amazing.  It does a much better job that silver or brass polish.  I used it to restore my antique brass bed, and the result was almost too new and shiny.


Yes I think it will come up beautifully, and it did.


I also bought 3 lovely old tourist pictures of Rome for $1 each.


There's the Colosseum, Trevi Fountain, and The Piazza Navona.


This is stamped onto the back of each framed picture.  I figure if somebody went to the trouble of packing these in their suitcase and bringing them half way around the world back to Australia, then they are special.  I wonder who owned them and when they bought them?  I am going to hang them in the guest bedroom.


Thursday, 9 June 2011

He Finally Gets It

On Saturday night my husband took our son and his mate up to the video store to hire a movie.  He came back with this.


He found it on the side of the road (you know how people put stuff on the kerb in the hope that someone will take it) and brought it home.  That is something I never dreamed he would do.  I think he finally gets the whole decorating on a budget thing.

He knew that I had been working hard to restore and paint an old desk for our daughter, so he grabbed this chair so she could use it at her desk.  It's got a little piece missing from one leg and has some white paint splashed on the seat but it is as solid as a rock!  I am going to sand and paint it, then make a pretty seat cushion.


Well done honey!

Wednesday, 8 June 2011

Ahh Tissue

In my effort to make the guest bedroom (or in fact my whole house) a stylish setting, I am trying to make things both practical and pretty.  So when I decided to put a box of tissues in the guest bedroom (practical), I couldn't bring myself to put a store-bought printed tissue box (not pretty) in it.  Time for some decorative cover-up.


I had some linen fabric in my sewing box and I attached some iron-on interfacing to stiffen it.  I traced around all four sides of the tissue box with a fabric marker and added 1.5cm (5/8") seam allowance. 


Then I traced around the top of the box and marked a circle cut out, again leaving a seam allowance.  I sewed all 4 side seams together. I then sewed the top piece to all the side pieces, and over locked all the edges. I turned up the bottom hem and stitched it in place.


I cut out a circle for the top section, snipped the seam allowance and used fabric glue to fold it back.  When it was all done I pressed all the seams with the iron. 


For decoration, I raided my button jar and randomly glued buttons to the front in the shape of a heart.


I am really happy with the way it turned out.  It took less than an hour to make and I think it is definitely practical and pretty.


Sharing at:

As always with Sarah at
A BEACH COTTAGE

and for the first time with

Tip Junkie's - Tip Me Tuesday

Monday, 6 June 2011

Hail From Above

On Wednesday, the eastern suburbs of Brisbane was hit by a a freak hail storm.  I had heard a warning on the radio at 3pm that it was expected to hit Macleay Island within half an hour, so I knew it would reach us at about 3.45pm.  The exact time that I needed to pick up my son from the bus stop after school.  What was I going to do?  Hail storms here can be really severe - the size of golf or tennis balls which can really mess up your car, but I couldn't exactly leave my son to stand in the street during a hail storm.

My daughter who was already at home did not want to go out in the car if there was going to be a hail storm.  She said she would be much happier to wait at home where it was safe.  So I locked up the house and raced to get my son.  Of course the storm hit as soon as I got to the bus stop.  Thankfully the hail was small but there was so much of it.  I rang my husband to tell him what was happening and to let him know that I had driven his car to the bus stop (I wasn't silly enough to drive mine) and I could barely hear him over the noise of the hail hitting the car roof.

Finally the bus pulled up and my son and his mate ran to the car.  They said the hail hurt their heads when it hit them.  When I got home I immediately called out to see that my daughter was OK and she wasn't frightened by the storm.  She was fine.  In fact, she was quite chirpy and then she pulled out the camera and showed me some of the 47 photos she had taken.


She took a photo of a hail stone to show Dad

And then the storm was over

Friday, 3 June 2011

The Guest Bedroom Furniture Makeover

The guest bedroom doesn't have a lot of furniture - a bed, bedside tables and a bench seat.  In my effort to have the room ready for my sister's visit I decided to give them a freshen up.

The Bedhead

I bought the ensemble when I was 20 years old.  It was my first 'big' bed.  It's still in very good condition so all I've done is purchase one of those comfy, fluffy mattress toppers.

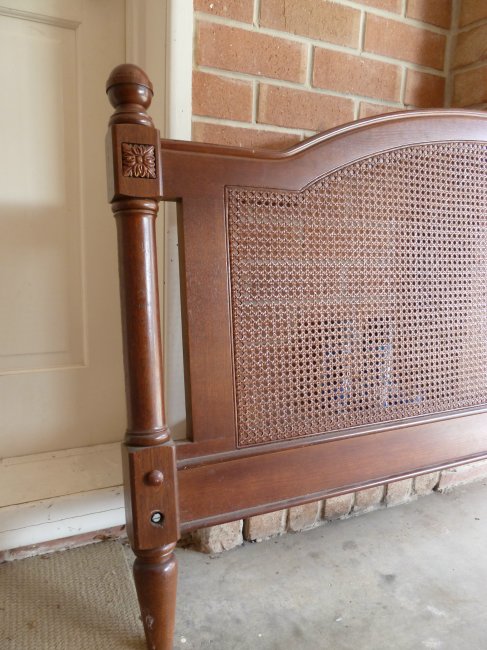
I like a bedhead behind an ensemble.  I think it makes the bed look finished and keeps your head away from the wall.  I don't really like bed foots as they can visually close off a room and I like to sit on the end of the bed and bed foots just seem to get in the way.  A little searching on eBay and for $21 (yes that's right only $21) I found this....


It was a bed head and foot but was missing the side rails.  The ornate carving was missing from the top of the bedhead but there was one on the bed foot and both pieces had lovely carving in the posts.


I was able to gently chisel the top carving off the bed foot and glue it onto the bed head.  Then I gave the bedhead a sand and a coat of paint and it turned out like this ......


My beautiful white bedhead


The Bedside Tables

I've owned the bedside tables since I was a teenager.  My Dad made me a piece of timber that I sat across the two tables to form a desk.  After I finished studying, I used them as bedside tables. 


Terrible Photo taken years ago but you get the idea of how it looked
They were simple pine bedside tables but they had nice decorative moulding and dove-tail joints.  Over time the centre panel of the doors had cracked and opened up.  I removed the the centre insert from the door frame and replaced it with chicken wire.  Gave the whole thing a sand and paint and changed the drawer knobs from brass to crystal.  It took a while and tested my carpentry skills but I'm really happy with them now.


Chicken Wire Insert
I also have a timber bench seat to go in the guest bedroom which I have also painted white.  I'll post some photos of this shortly.

The guest bedroom is really starting to take shape.  Now I need to empty the room to re-paint it.  I don't like painting walls and using the roller.  You really have to be in the mood don't you?  Just waiting for that mood to arrive.....


I am so proud of this project that I am sharing it at these lovely blogs


Feathered Nest Friday

Related Posts Plugin for WordPress, Blogger...