Thursday 29 November 2012

Decorating Christmas Crackers or Bon Bons

How's your Christmas planning going?  Started yet?  I've only bought a couple of presents, but I've made the Christmas crackers.


Every year I make Christmas Bon Bons or Crackers.  I don't know why?  I must be crackers.  I think it's because I don't like the tacky gifts they put inside the store-bought ones or the cost of the 'luxury' crackers.  This year I cheated a little and bought a kit, which made it so much easier.  This silver kit is $3 at Spotlight and includes 6 pre-cut crackers, snaps, ribbon ties, party hat and bad jokes.


Here's how to make them.  I didn't want plain silver, so I decided to decorate my crackers with a simple white doily.  Just glue it on (it's a bit messy).  Turn the cracker over and tape down the snap towards the back of the cracker.


Then I added an embellishment.  These silver snowflakes were $2 for 6 from Overflow.  There are so many pretty decorations available, just choose something flat that can be attached easily.


I attached the snowflake to the cracker with a hot glue gun, then folded the cracker into shape.  Use a gentle up/down motion to get the tabs into the slot.


Now tie a piece of ribbon or string around the bottom of the cracker.  I decided to use the silver ties that came with the packet (both packets were one tie short Spotlight!!!) as I wanted the doily to be the feature.  Previously I've used pretty ribbon so it becomes the feature.  Now you can fill the cracker.


I used the hats and jokes that came in the packet and added some Christmas Lindt chocolates.  These are the same chocolates I used for my Lindt Chocolate Christmas Tree last year.  Other gifts I've used before include; lipsticks, key rings, beaded bracelets, earrings, scratchy tickets, lollipops ....  You can use pretty much anything that will fit inside the cracker.  You can also type up your own jokes or write inspirational messages to put inside.  Once the cracker is filled, tie-off the other end and it's finished.


Sparkly Snowflakes (leave glitter everywhere)


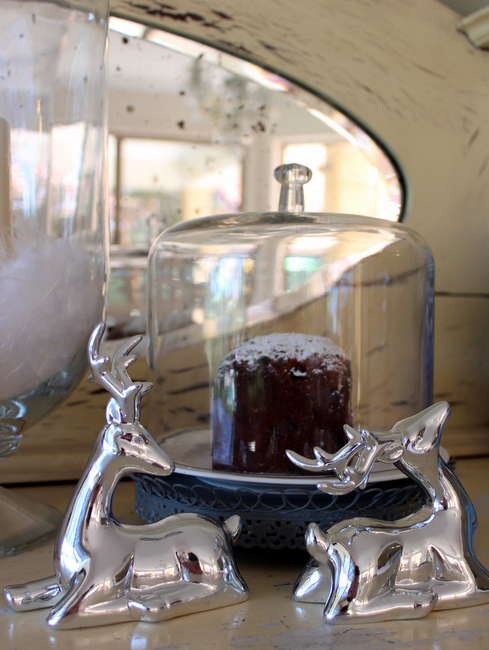
I'm not hosting Christmas at my place this year, but if I was I'd decorate the table with these pretty silver reindeer - $4 each from KMart


and I'd bring in some roses from the garden, and pop them in little silver votives.


I'd use the new silver charger plates I picked up from KMart for $2 each, and hopefully my table would look like this.


If any of you have any suggestions for what gifts you can put into a Christmas Cracker, please share it with us in the comments section below.

To see more Christmas decorating, please visit my new blog DIY Decorator


Monday 26 November 2012

A Christmas Menu Coming Soon


Oh my goodness - I'm exhausted.  I made and photographed an entire Christmas menu on the weekend.  I'll share it with you shortly.


This is a little Christmas cake I made.

We also managed to get the tree up on the weekend.


My little helper did nearly all of it herself this year.  I helped with the tree and the lights but she did the decorations, and I think she did a mighty fine job.  Hope all your Christmas preparations are coming along.  There are only 28 days until Christmas eve.

post signature

Wednesday 21 November 2012

A Menu Chalkboard


Hi everyone.  Guess what?  I've made another thing from my Pinterest things to make list. See - set yourself a goal and you will achieve it.  This is my chalkboard menu.


How I Made It

Before I went to the hardware store, I shopped at home first.  I found a piece of plywood in the garage that I'd used to line the bathroom shelves, a spray can of chalkboard paint that I used to make my chalkboard placemats, and some rope I used to wrap my mum's present. That was everything I needed - no need to go to the shops.

Cut & Drill
I cut the plywood to about 50cm wide x 70cm tall.  I used a jigsaw to cut the curves out of the top.  Then I used the biggest drill bit I had to make two holes for the rope to go through.  Two power tools in one day - I am women, hear me roar! LOL.

Paint
When I was happy with the size and shape of the chalkboard, I painted it with undercoat.  I use Zissner.  Once it was dry, I gave it a light sand.  Then I sprayed it with 2 coats of chalkboard paint, giving it a light sand between coats.  You want a smooth surface to write on.


Distress
Freshly painted chalkboard is lovely and black but I wanted something a little more distressed and old looking.  This is what you do ... Ignore the chalkboard paint instructions that say to leave the chalbkoard paint to cure for 24 hours before using.

After the final coat of chalkboard paint is touch dry, about 1 hour, grab yourself some white chalk.  You wouldn't think that would be hard but the only place I could find white rather than coloured chalk was at Typo.


Get a piece of chalk and rub it all over the chalkboard.  Use a dry cloth to wipe it off.  Now get a damp cloth and do some random dabbing and wiping.  When it dries you will be left with a softer dabbled look.  I also sanded the corners and edges to expose some of the plywood.


Finally I thread through the rope, tying knots at the ends, and hung it up above the BBQ.


Here's a close up of the rope and edges.


and here you can see the splotchy effect on the chalkboard.


So the outdoor kitchen is taking shape.


Really need to makeover my Dad's old butcher's block to go under the clock.  Add it to the To Do list.


I'm now planning an OMS-friendly Christmas menu.  Hope your Christmas planning is coming along.  Just over one month away now.

Monday 19 November 2012

A Winner & Some News

Thank you to all of you who entered my Thank You Giveaway, for the silver hearts.


The winner is Deanne from Five Brothers One Sister

True Random Number Generator

2Powered by RANDOM.ORG
Some Exciting News & A Few Changes

As you know, after I was diagnosed with MS, I was determined to do whatever it took to stay healthy and live a happy life.  I settled on the Swank diet and Overcoming Multiple Sclerosis (OMS) Recovery Plan.  That meant big changes to my diet (and subsequently my family's diet).  I eat no dairy - no milk, cheese, cream, sour cream, yoghurt or butter.  The only meat I eat is seafood.  I don't eat any processed foods - no cakes, biscuits, sausage rolls, no take-away.  Pretty much nothing from a bakery other than the bread and I skip half the aisles in the supermarket.


The first few months were really tough.  I had to stop and think about everything I ate.  I had to find new recipes and re-invent old ones.  I had to find ways to prepare family meals so my dietary needs were met without always having to cook separate meals.  I had to be organised.  Plan my meals in advance, and remember to take food and soy milk with me.


It was a challenge.  It was also the reason I started The MS Foodie part of my blog.   Well now I have a new challenge.  The Overcoming MS team would like me to share my OMS friendly food and ideas with their members who are going through the same struggles and adjustment that I am.  As a result, my recipes will address the specific needs of people who follow the OMS diet.  In the past, I've tried to keep it more general so the recipes would have a broader appeal.  It also means I may post more recipes than before.  Now I know that some people are only interested in home decor, some people are only interested in the recipes and some like both.  I thought about making The MS Foodie a separate blog but it's enough work maintaining one blog let alone two.


I am really excited to work with the OMS team on this.  The recovery plan I follow is not a short-term diet but a long term commitment  that I am passionate about, and if I can help other people in my situation then that's what I really want to do.  I hope all you home decorating people will understand, but don't worry, there will still be plenty of DIY and making things happening around here.

post signature

Thursday 15 November 2012

The Best Ever Low-Fat Chocolate Sauce

You know you're onto a winner when your son says "Can you buy some more of that chocolate sauce in the fridge?"  "You mean the one in the jam jar?" I ask, "I make that."  "You make that?  It's awesome!!!"  


Yep, it's the most delicious rich dark chocolate sauce.  Not too sweet with a strong chocolate taste.  I would say it's an adult's chocolate sauce, but my kids love it.  The best bit - there's  virtually no fat.  Here's how to make it.

Ingredients:
3/4 cup of raw sugar
1/2 cup cocao powder (approx 40 grams)
pinch salt
1/2 cup water
1 teaspoon vanilla extract/paste


Method:
Put all the dry ingredients in a saucepan and whisk until combined.  Gradually add the water and stir well.


Heat on medium heat, stirring until the sauce reaches the boil.  Reduce the heat a little and cook for a about 3 minutes whisking the sauce, making sure the sauce doesn't boil over.  The sauce will thicken up.

Remove from the heat and allow to cool at room temperature.  Strain the sauce through a fine sieve, then stir in the vanilla.  


I keep my chocolate sauce in an empty Bonne Maman jam jar with a screw top lid.  Keep refrigerated, but it won't last long before the kids eat it all.


This recipe comes from food.com and was posted by a guy called Steve_G. (original recipe here)  Steve is a legend because this sauce is the best!  The original recipe uses granulated (white) sugar, and Dutch-processed cocoa, which I've substituted.

This sauce is great over pancakes, or my kids have it over ice-cream and waffles.  You can use it to make milkshakes, and hot chocolates (I just use non-dairy milk).

This is how my daughter drowns eats her pancakes.

What is Chocolate ?

Okay, this is the simple version.  Cacao beans grow on cocoa trees (botanical name Theobroma Cacao).  These cacao pods or beans are harvested when ripe,  fermented, then dried.  The beans are cracked into small nibs which are roasted to a rich brown colour.  The nibs are ground to form a rich liquid known as chocolate liquor or mass.  This liquid is roughly half cocoa butter (fat) and half cocoa solids (non-fat).  Because of the fat content this liquor solidifies when it cools.  This is called unsweetened or bitter chocolate.  This chocolate mass can be pressed to extract the cocoa butter.  The cocoa solids left are ground into a fine powder known as cocoa powder.  The low-fat content of cocoa powder means it is easier to dissolve into liquids for example, to make hot chocolate.

To make the chocolate, manufacturers use the cocoa butter that was extracted, but it's quite bitter so they add things like sugar, milk and vanilla.  The chocolate is then refined or conched to make it smooth, and tempered to make it glossy and give it crunch or 'snap' when you crack it.

In June, 2009.  Learning how chocolate is made at the Chocolate Museum in Brugge, Belgium.


What is the difference between cocoa powder and Dutch-pressed cocoa powder?

Natural Cocoa powder is acidic.  Dutch-processed cocoa has been treated with an alkali (potasium) to make it Ph neutral.  This makes Dutch-processed cocoa more soluble, richer in colour, and milder or smoother in flavour.  This processing uses high heat which removes a large percentage of the flavonols or anti-oxidants in the cocoa.


What is cocao powder?


Cocao powder (pronounced ka-kow) is made by grinding raw cocao nibs which preserves the anti-oxidants.  It is cold-pressed without solvents.

I buy Raw Cocao powder (see here).  This is what it says on the pack - with over 360% more anti-oxidants than regular cocoa, that's also 14 times more-potent anti-oxidants than red wine, 21 times more than green tea, and 7 times more than dark chocolate.  The problem is of course, that by heating the cocao powder to make the chocolate sauce, I am probably destroying many of the anti-oxidants, but if it starts with more anti-oxidants, it will hopefully still end up with some.

Nutritional Information:  40 grams of cacao powder contains 4.5g of fat, 2.6g saturated fat.  That's for the whole jar of chocolate sauce.  So if you just drizzle a little sauce over a banana for dessert, the fat content is not high.

Resources - The Joy of Baking here.  There is also a good blog post at The Lone Baker here - look at the bottom of the page to understand acidity in baking, and of course David Lebovitz has a great explanation here.


Enjoy the sauce.  It's good.

Sharing at House of Hepworths, It's Overflowing

Wednesday 14 November 2012

How to Make a Distressed Timber Sign

I've been slowly working on our outdoor kitchen area.  Getting it prettied up for summer BBQ season.  Here's the latest addition - a distressed sign.


How I Did It

The Background for the Sign
I found a left over timber plank in the garage and cut it to size.  My plank was 9cm wide and I cut it to a length of 70cm.  I painted the sign with a coat of burnt umber (I use Jo Sonjas).  I didn't bother to undercoat it first.


Then I mixed some white paint (Dulux aqua-enamel in Whisper White) with some water to thin it down a little.  I brushed it on quickly and carelessly.  I used a clean rag to gently wipe some of the paint off (while it was still wet) so the brown layer underneath would be visible through the white paint.


To allow more of the brown paint to come through I used sandpaper to remove some of the white layer from all over the sign, but particularly the edges and corners.  

The Wording for the Sign
My husband and I talked about what the sign should say, as it was going to hang over the bar fridge in our outdoor kitchen.  His suggestion was 'Drink More Pi*s'.... we settled on Maison des Vins, which means House of Wines.  On our honeymoon, we went to the most amazing restaurant called Maison des Vins in Les Arcs, Provence.  If you are ever in Provence, go there (website here).

I printed the words onto an inkjet water-slide decal paper.  The font is Copperplate Gothic Light, font size 180.  Once the ink has dried, spray the words with a couple of coats of clear acrylic sealer in a matte finish.


Cut around each word as close to the letters as possible.  Soak the decal paper in water until the backing paper slides away, line the words up on the sign and slide them off the backing paper.  Smooth out and blot dry with paper towel.  This is the same method I used to make the decal number bottle vase.


The Finished Sign
I hung the sign above our outdoor kitchen sink.


I bought this clock recently from Pillow Talk.  It has a great rusty brown frame.


and I'm still loving the vintage style medicine bottles I made (see here)


So this side of the outdoor kitchen is taking shape.


Need to fill up that fridge before the Christmas party season don't I?


Monday 12 November 2012

DIY Light Fittings - A Quick Makeover


Hi.  Do you have ball lights in your house?  You know the really cheap do-it-yourself glass ball light fittings.  Well my whole house was full of them when we bought it.


Not the prettiest light fitting?  Over the years we have replaced many of the light fittings in our house, but I still have a few of these insect-filled balls haunting me.  I decided enough was enough and I was going to replace them myself.  Not being an electrician, my only option was to visit the shops for some DIY light fittings.  I must say I was pleasantly surprised.  The range of DIY lights on offer has improved greatly.  This is what I cam home with.


A beige fabric lampshade with pretty rows of crystals hanging down.  I hung this one in our staircase.  This is what it looks like lit up.


 This almost Moroccan style one is now at the end of our bedroom.


and finally this waterfall style chandelier in now in my walk-in-wardrobe.


It makes a pretty pattern on the ceiling when it's lit up.


It's a little bit like Fun and VJ's Murano chandelier here, that Anita used to replace her ball light.

DIY lights are so easy to install.  You simply remove the light globe.  Unscrew the collar on the batten, remove the existing DIY light fitting, place the new DIY light fitting in place, and rescrew the collar onto the batten.  Done in less that 5 minutes and it can completely change the look of your room.  The best bit is - If I decide I don't like them later on, I can just change them again.  No need to call an electrician.

post signature
Related Posts Plugin for WordPress, Blogger...